Having recently joined the SolidWorks technical team at TMS CADCentre a lot of my time has been dedicated to expanding my SolidWorks knowledge by participating in SolidWorks training courses. Although I had used SolidWorks extensively in my own design work and considered myself as somewhat of a seasoned user I was amazed at some of the functionality covered in the training courses that I simply was not aware of.
Top down modelling from Assembly Modelling is a prime example of this and will be the focus of this article. By ‘Top Down’ we refer to creating parts in the context of the assembly as we go, opposed to the more commonly used ‘bottom up’ method wherein all the parts are created separately.
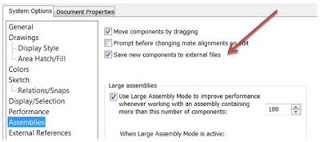
Before beginning you can set any subsequent parts created in the assembly to save as external part files under system options/assemblies. If you do so, you will be prompted to define a save location upon new part creation.
To start adding your new part go to insert components and when prompted select a reference planer face.
The assembly is now ready for the creation of a new part. As the geometry I require to create the pulley already exists I don’t need to bother re-creating it and can instead just do a simple convert entities command and a basic extrude. The outer diameter is taken from the pulley at the opposite side of the crankshaft and the inner diameter defined by the pulley end shaft.
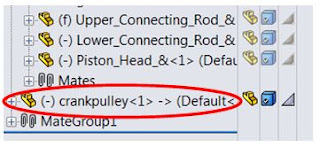
The new part appears in block colour for clarity until clicking the confirmation icon in the top right corner. Note how the new part is now inserted into the tree and appears in the defined save location if you chose to ‘Save new components to external files’.
And that’s it! I’ve quickly and easily added a new part to my assembly without even having to create a sketch by using in context top down modelling. Using the same quick process I’ll also add another pulley to simulate how this crankshaft could connect to the camshaft.
Notice I’m not constrained to referencing a face when creating my new part – I can use a plane, which is what I’ll do here. The camshaft pulley is created using some simple geometry and a boss extrude. Mating this pulley in place is not essential as it’s likely I would go on to construct the camshaft which the pulley would be fixed to.
Lastly, to complete my in context modelled pulleys I’ll use a belt to link them using the Belt/Chain tool. Notice how the belt/chain tool inserts only a representative sketch line.
A top tip with the belt tool is to select ‘Create belt part’ under properties. This creates the belt as a separate part, meaning it can then be opened and edited. This is useful here as it means we can extrude it and have a better representation of a belt than a sketch line.
I hope you find this functionality as useful as I do when it comes to simplifying and quickening the process of adding parts to an assembly. Now go try adding some in-context parts to that old assembly you have!


very useful and interesting.
ReplyDelete