I was recently contacted by a customer who designs and manufactures a range of optical and crystal monitoring and control systems. Included in their design work is the requirement to position lens components with a high level of precision. This often includes using a spacer component to ensure that an energy source is a specified distance from the lens surface.
The customer wanted advice on how to accurately mate the spacer to the domed surface of the lens as automatic mates would not give him the result that he wanted. The following post has been written to assist users with similar issues.
The projection of a linear dimension onto a spherical surface produces an irrational number and you will therefore be unable to mate the surfaces directly together. However there is a way of working around this by creating sketches within the individual parts and mating these together instead as explained below.
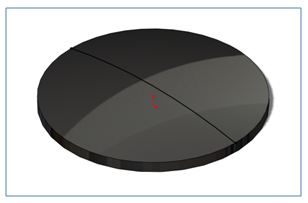
For this example, a spherically domed lens is required to mate with a cylindrical tube spacer to be used within the prism assembly shown above. The transparency has been changed in the parts to make the images clearer.
If attempts are made to mate surfaces or edges together on the parts, the following results may be given.
By selecting the domed face and the internal circular edge of the spacer, the required calculations to produce a coincident mate create irrational numbers and the geometry cannot be mated.
By selecting the circular face of the spacer part and the circular edge of the domed face of the lens part, the mate produced will pull the spacer part through the domed surface.
Solution for the problem
Open the Lens part and start a new sketch on a plane that dissects the domed face of the lens.
Select the silhouetted edge of the dome and use the convert entities function. This will create a 2D sketch profile of the dome. Ensure the sketch is left visible and save the part.
Open the Spacer component. This example was constructed using a Boss-extrude followed by a cut extrude.
Open the sketch that defines the profile of the hole through the spacer. Use the sketch point tool and add a point that is coincident with the profile of the sketch that defines the hole.
Show the sketch that defines the profile of the hole so that it will be visible when you view the part in an assembly.
Now that the sketches in the part files have been created, they can be used to mate the parts together.
Now that the sketches in the part files have been created, they can be used to mate the parts together.
In an assembly that contains the lens and spacer parts, you can now mate the point that you created on the sketch for the profile of the hole in the spacer, with the silhouette sketch on the lens part.
This will ensure that the point will be coincident to the silhouette sketch
Make the temporary axes visible to be able to mate to the central axis of the lens. In this case the spacer’s axis will be mated to the axis of the lens.
The sketch point on the profile of the hole sketch is coincident with the silhouette edge of the domed surface of the lens, and will keep this relation when the parts axes are mated.
By mating the sketch geometry created together, the required result of the spacer connecting with the lens at their extents can be achieved


No comments:
Post a Comment