
Do
you evaluate your mechanism assemblies before investing 3D modelling time?
Having
participated in several design projects requiring the development of a
mechanism, I’m sure I’m not alone in investing a fair amount of time in a
mechanism assembly which, according to my trusty pen and notepad will function
beautifully, to find that the reality is that its fundamentally flawed. So, how can SolidWorks help in this stage
between notebook scribbles and a fully solid model?


When fully retracting the
jack, a fairly obvious design flaw with the top link becomes evident, meaning
the jack doesn’t retract low enough.
Of
course, we could make some changes in this assembly to overcome this flaw,
however given that I’ve already spent time creating the assembly and now, I’m looking to spend more making changes, it may
have been more efficient to conceptualise my mechanism as a Layout Based
Assembly Design, then create the 3D geometry.

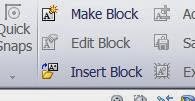
Once
we’ve inserted our subsequent blocks, sketch relations can be used to associate
the blocks together. In this case, I’ll
be using a concentric sketch relation

Now
with all my sketch blocks in place and sketch relations added, I can move the
mechanism and begin to evaluate it. The
issue we identified from the original assembly now becomes evident. The difference here is, as I’ve not had to
create 3D geometry or even mate the components together I’ve identified this
issue in a matter of minutes.

Rectifying
the flaw is as easy as deleting the offending block and replacing it with a new
one. Evaluation tools such as measure are supported in a Layout Based Assembly
Design, so we can be sure we’ve improved the design.


Once satisfied with our
mechanism assembly we can convert the blocks to 3D geometry easily by right
clicking on the block in the feature manager tree and selecting ‘Make Part from
Block’
Notice
at this stage the block is converted to a part file, which when right clicked
has the option to either ‘open part’ or ‘edit in context’ from the toolbar at
the top.
The
end result of converting my sketch blocks to 3D geometry can be seen below.


No comments:
Post a Comment