
With the new release of SolidWorks 2014 so close, it may be time to start planning your upgrade to the new version of SolidWorks.
As a support technician, at this time of year I receive a lot of questions about updating network installations. This isn’t because it’s complicated (far from it), it is because updating a network installation is done maybe once a year and it’s easy to lose that scrap of paper that you wrote the procedure on last time. So here’s the procedure for all those who would like a reminder.
Just for your own piece of mind, before you start, have a copy of the installation files for SolidWorks and your License/Serial number at hand. If you have also lost the scrap of paper that has the your License/Serial number on it, the quickest way to find it is to log on to one of the computers that is running SolidWorks and in SolidWorks go to the file menu and select Help – About SolidWorks. This will show you the License/Serial number that is currently being used to connect to the Server.


The key to updating a network installation is to update the Solid Network License (SNL) manager on the server first and foremost. The reason for this is that all of the client machines or workstations will contact the server to check for an available license to run SolidWorks. The SNL manager holds a version specific license activation meaning that if it is currently running SolidWorks 2013, the client machines will be able to run SolidWorks up to version 2013. If a client machine updates to SolidWorks 2014 without updating the server, it will contact the server for an available license and the SNL manager will not recognise the request and SolidWorks will not be able to open.
To update the SNL manager, log on to the server either at the physical terminal, or via remote desktop etc., first ensure that there are no clients accessing a license. This can be done through the SNL Manager software available if you browse to the windows Start menu – Programs – SolidWorks XXXX (where XXXX is the version) – SolidWorks Tools – SolidNetWork License Manager.


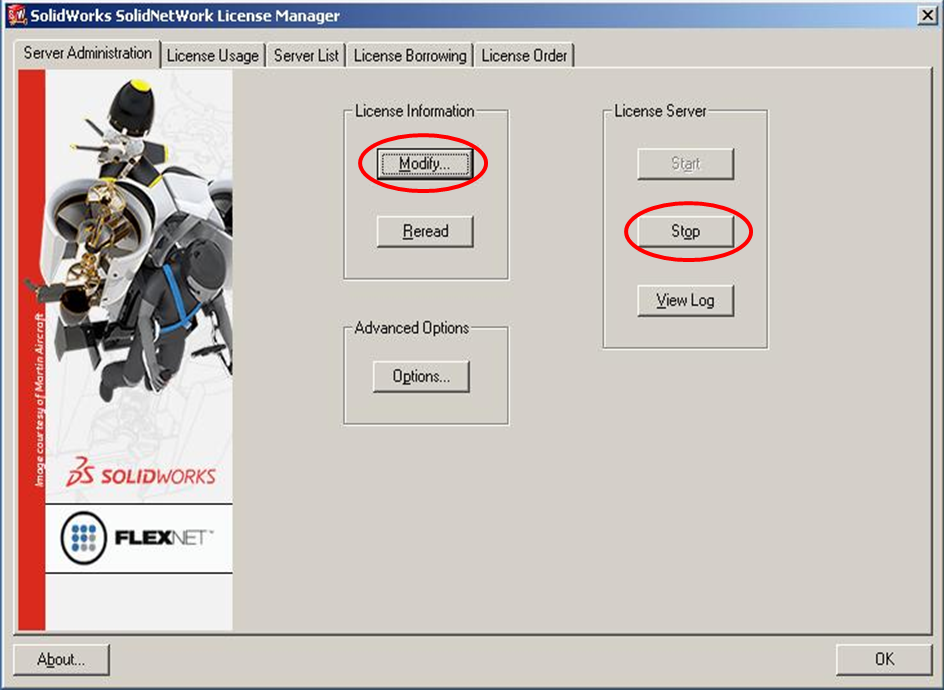
Once you have confirmed that no users are currently borrowing any licenses, it is advisable that you Stop the service so that there are no attempts to access a license during the upgrade process. This can be done from within the SNL manager software.

The next step is to transfer the license back to the SolidWorks database. In the SNL manager, under License Information, select Modify and choose the option to transfer the license. This step ensures that when you come to activation for the new version of the SNL manager, the correct license type and license availability is obtained.

Once the license has been transferred from the server, my advice would be to uninstall the software and reinstall a brand new copy rather than updating. Simply go to the control panel in the Windows start menu and uninstall the SNL manager using the SolidWorks Installation manager.

Now, with the shiny new media kit, or with a full file set downloaded through the customer portal, run the installation manager. On the welcome screen, you want to choose the option for Server Products. This will take you through the process of installing a new copy of the SNL manager. Re-Activation of your License can either be done automatically over the web, or via email. You may be asked for your License/Serial number during this process depending upon how thorough you were during the uninstall process.

Once you have re-installed and re-activated, I do recommend rebooting the server if possible as the SNL is the same as any other computer software and some registry files will only get fully written upon restarting the computer.
Open the newly installed SNL manager software and just make sure that the service is started and that the correct license allocation is present. If this is all as expected, the update on the server is done and now it is time to update the client machines.
There are a variety of ways in which this can be done, all of which are discussed in the Installation and Administration guides available on the Customer Portal through References – Admin Guides.
In brief, the process can be bulleted as;
- Update the SNL manager FIRST
- Ensure no licenses borrowed and Stop service
- Transfer License using SNL manager
- Uninstall SNL manager software using Installation manager
- Install and reactivate new version of SNL manager
- Ensure service is restarted (reboot if possible)
- Update the client/user machines
No comments:
Post a Comment